
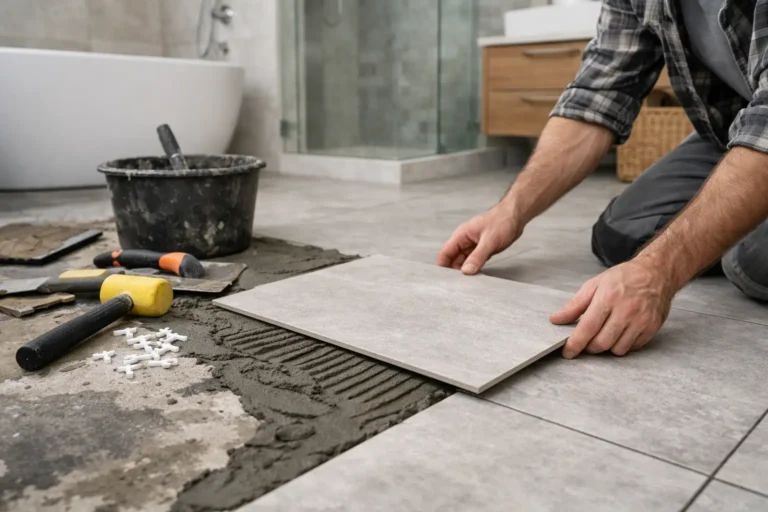
A bathroom floor can make the whole room feel dated fast. Cracked tile, soft spots near the toilet, old grout lines, or a floor that always feels cold underfoot are usually signs that it is time to stop patching and start over. If you are figuring out how to remodel bathroom floor surfaces properly, the real goal is not just a nicer finish. It is building a floor that handles moisture, daily traffic, and years of use without problems hiding underneath.
This is one of those projects where the visible material gets most of the attention, but the prep work matters just as much. A beautiful tile floor installed over movement, water damage, or an uneven subfloor will not stay beautiful for long. The right approach starts below the surface and works up.
How to remodel bathroom floor without costly mistakes
The first decision is whether your bathroom floor needs a cosmetic update or a full rebuild. If the existing floor is solid, level, and dry, replacing the finish material may be straightforward. If there is rot around the toilet flange, loose underlayment, or signs of leaking from the tub or shower, the project becomes more involved.
That difference matters for budget and schedule. Homeowners often expect flooring to be a simple swap, then discover the old vinyl trapped moisture or the tile was laid over a weak base. A dependable renovation plan leaves room for that possibility instead of assuming the surface tells the whole story.
Before any demolition starts, look at the age of the bathroom, the condition of nearby fixtures, and whether this remodel is part of a bigger upgrade. If the vanity, toilet, or baseboards are also due for replacement, it usually makes sense to coordinate everything at once. That avoids paying for finish work twice and gives the room a cleaner final result.
Start with the subfloor, not the tile sample
The subfloor determines how well the new floor performs. In many bathrooms, plywood or OSB under the finished floor may have years of moisture exposure around the tub, shower entry, or toilet. Even a small soft area can turn into cracked grout, shifting tile, or squeaks later.
Once the old floor is removed, inspect for staining, swelling, mold, or movement. Any damaged sections should be replaced, not covered. The floor should also be checked for level. Perfectly level is not always required, but the surface must be flat enough for the material going in. Tile especially does not forgive dips or flex.
This is also the right time to confirm the toilet flange height and the transition to the hallway flooring. A bathroom floor that sits too high or too low can create problems that are avoidable with proper planning.
Choosing the right material for a bathroom floor remodel
There is no single best bathroom flooring material for every home. The right choice depends on your budget, design goals, maintenance preferences, and how the bathroom is used.
Porcelain tile remains one of the most reliable options. It handles moisture well, comes in a wide range of looks, and holds up for years when installed correctly. It is a strong fit for family bathrooms and primary bathrooms alike. The trade-off is that tile takes more labor, requires a stable base, and can feel cold without radiant heat.
Luxury vinyl is popular for a reason. It is easier on the budget, more comfortable underfoot, and faster to install in many cases. Modern products can look surprisingly upscale, including stone and wood visuals. That said, product quality varies, and a lower-grade vinyl floor may not age as well in a heavily used bathroom.
Natural stone can create a high-end look, but it usually brings higher material and installation costs. It can also require more maintenance than homeowners expect. In a busy household, that may not be the most practical choice.
If you are balancing style, durability, and cost, the smartest move is often narrowing the options based on how you actually live. A guest bath has different demands than the main bathroom used by a family every morning.
Think about slip resistance and comfort
Bathroom flooring should not just look good. It should feel safe when wet. Glossy finishes may look sharp in a showroom but can be slippery in real use. Smaller tile often provides better grip because of the added grout lines, while textured porcelain can offer traction without sacrificing appearance.
Comfort matters too. If anyone in the home dislikes cold floors, underfloor heating may be worth considering during the remodel. It is far easier to add at this stage than later. It does increase upfront cost, so it is a quality-of-life upgrade rather than a requirement, but many homeowners find it changes how the bathroom feels every day.
The demolition and prep stage
Removing the old bathroom floor sounds simple until you get into layers of previous renovations. It is common to find old sheet vinyl under newer tile, extra underlayment, or patchwork repairs around plumbing. Careful demolition helps avoid damage to walls, tubs, and fixtures that are staying.
Dust control and protection matter here, especially in an occupied home. If the bathroom is the only one on the main floor or used by children, the project should be planned to minimize disruption and keep the home safe and usable.
After demolition, the floor assembly is rebuilt as needed. That may include replacing sections of subfloor, installing cement board or an uncoupling membrane for tile, leveling low spots, and making sure all seams and edges are properly supported. This is not the glamorous part of the remodel, but it is where long-term performance is won or lost.
Waterproofing is not optional
One of the biggest misunderstandings in bathroom renovations is assuming the finish material alone handles water. Tile and grout are not a waterproof system by themselves. Water can still get through and affect what is below if the assembly is not built correctly.
Proper waterproofing depends on the floor type and bathroom layout. Areas near showers, tubs, and toilet connections deserve extra attention. In some remodels, especially where the room layout changes or a curbless shower is involved, waterproofing details become even more critical.
This is also where experienced workmanship matters. A bathroom floor is exposed to repeated moisture, cleaning products, temperature shifts, and daily wear. Cutting corners in prep may save money upfront, but it usually leads to repairs sooner than expected.
Installation details that affect the final result
Once the base is solid and the waterproofing plan is in place, installation can move forward. Layout matters more than many homeowners realize. A well-laid floor has balanced cuts, clean lines at the walls, and thoughtful transitions around the vanity and tub. Poor layout tends to stand out even when the material itself is attractive.
For tile floors, grout choice matters too. Color affects the final look, and grout performance affects maintenance. Lighter grout can brighten a bathroom but may show staining faster in a high-use space. Darker grout is often more forgiving, though it can shift the visual style of the room. The right answer depends on the look you want and how much upkeep you are comfortable with.
For vinyl floors, expansion gaps, surface prep, and moisture control remain critical. A fast install is not the same as a lasting install. If the substrate is uneven or damp, even a premium product can fail early.
Should you remodel the bathroom floor yourself?
Some homeowners can handle a bathroom flooring update on their own, especially in a small powder room with straightforward materials. But there is a big difference between installing flooring and remodeling a bathroom floor correctly. Once plumbing fixtures come out, damaged subfloor appears, or waterproofing becomes part of the scope, the margin for error shrinks.
DIY can save on labor, but it can also get expensive if the floor height is miscalculated, the toilet does not reset properly, or the finished surface starts moving. If you are already questioning the structure underneath or planning to upgrade multiple parts of the bathroom, professional help often saves time and protects the investment.
That is especially true in older homes, where surprises are more common. A trusted contractor can spot issues early, recommend materials that fit your budget and lifestyle, and make sure the finished floor looks right and performs the way it should. At HB Renovations, that kind of planning is part of treating the project like it matters, because it does.
Budgeting for a bathroom floor remodel
Bathroom floor costs vary widely based on material, room size, demolition needs, and repair work below the surface. A simple flooring replacement in a dry, well-built bathroom is very different from a remodel that includes subfloor replacement, heated flooring, or layout adjustments.
The best budgeting approach is to separate what you want from what the room requires. Your finish material is a design choice. Structural repairs, leveling, and moisture protection are performance requirements. If the budget gets tight, it is usually better to simplify the surface material than to compromise the prep.
It also helps to keep a contingency in place. Bathrooms are small spaces, but they often hide the most wear. Planning for a little unknown work keeps the project from becoming stressful if something is uncovered after demolition.
A bathroom floor should do more than look new on day one. It should feel solid, clean easily, and hold up to real life without constant maintenance or second-guessing. If you approach the project with the right prep, the right material, and a clear plan from the start, the finished result tends to show it every single day.
